


Rondabox 200x100x80 cm Raised Bed Wooden effect
What do the statuses mean?
- Available In stock and ready to ship.
- Other combination In stock in another combination - change your selection.
- Coming soon Not yet available, but you can reserve it now - it will be shipped on the expected date.
- Back soon Temporarily out of stock, we expect to restock it soon.
- Not available Discontinued and can no longer be ordered.
Additional services for your product
Choose extra services to protect and extend the life of your product.- Ready for delivery In stock and ready for you! Order now and enjoy your purchase without delays. In stock and ready for you! Order now and enjoy your purchase without delays.
- Shipping time: 3 - 5 days Receive it sooner than you think. Don’t miss this opportunity, order now! Receive it sooner than you think. Don’t miss this opportunity, order now!
- 14 day cooling off period
Top features
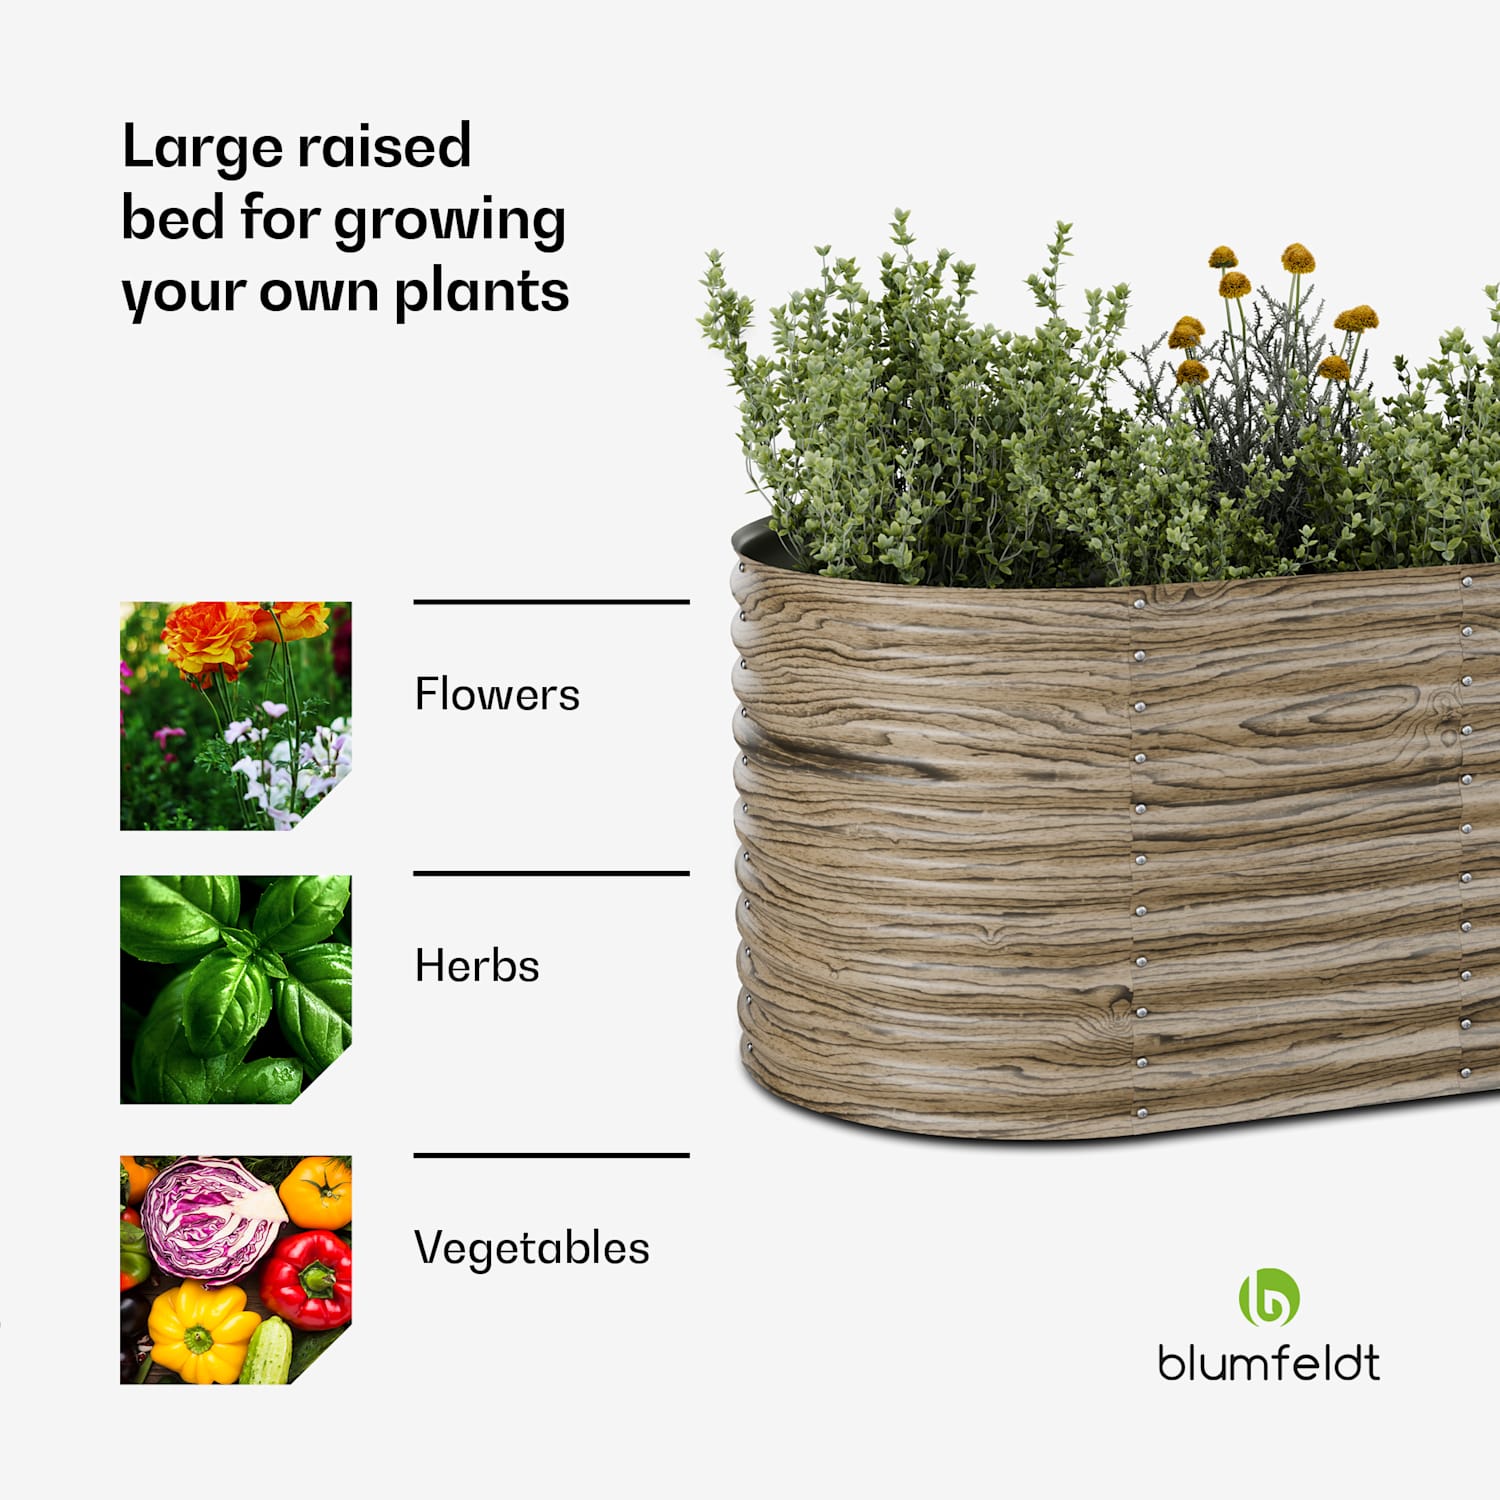
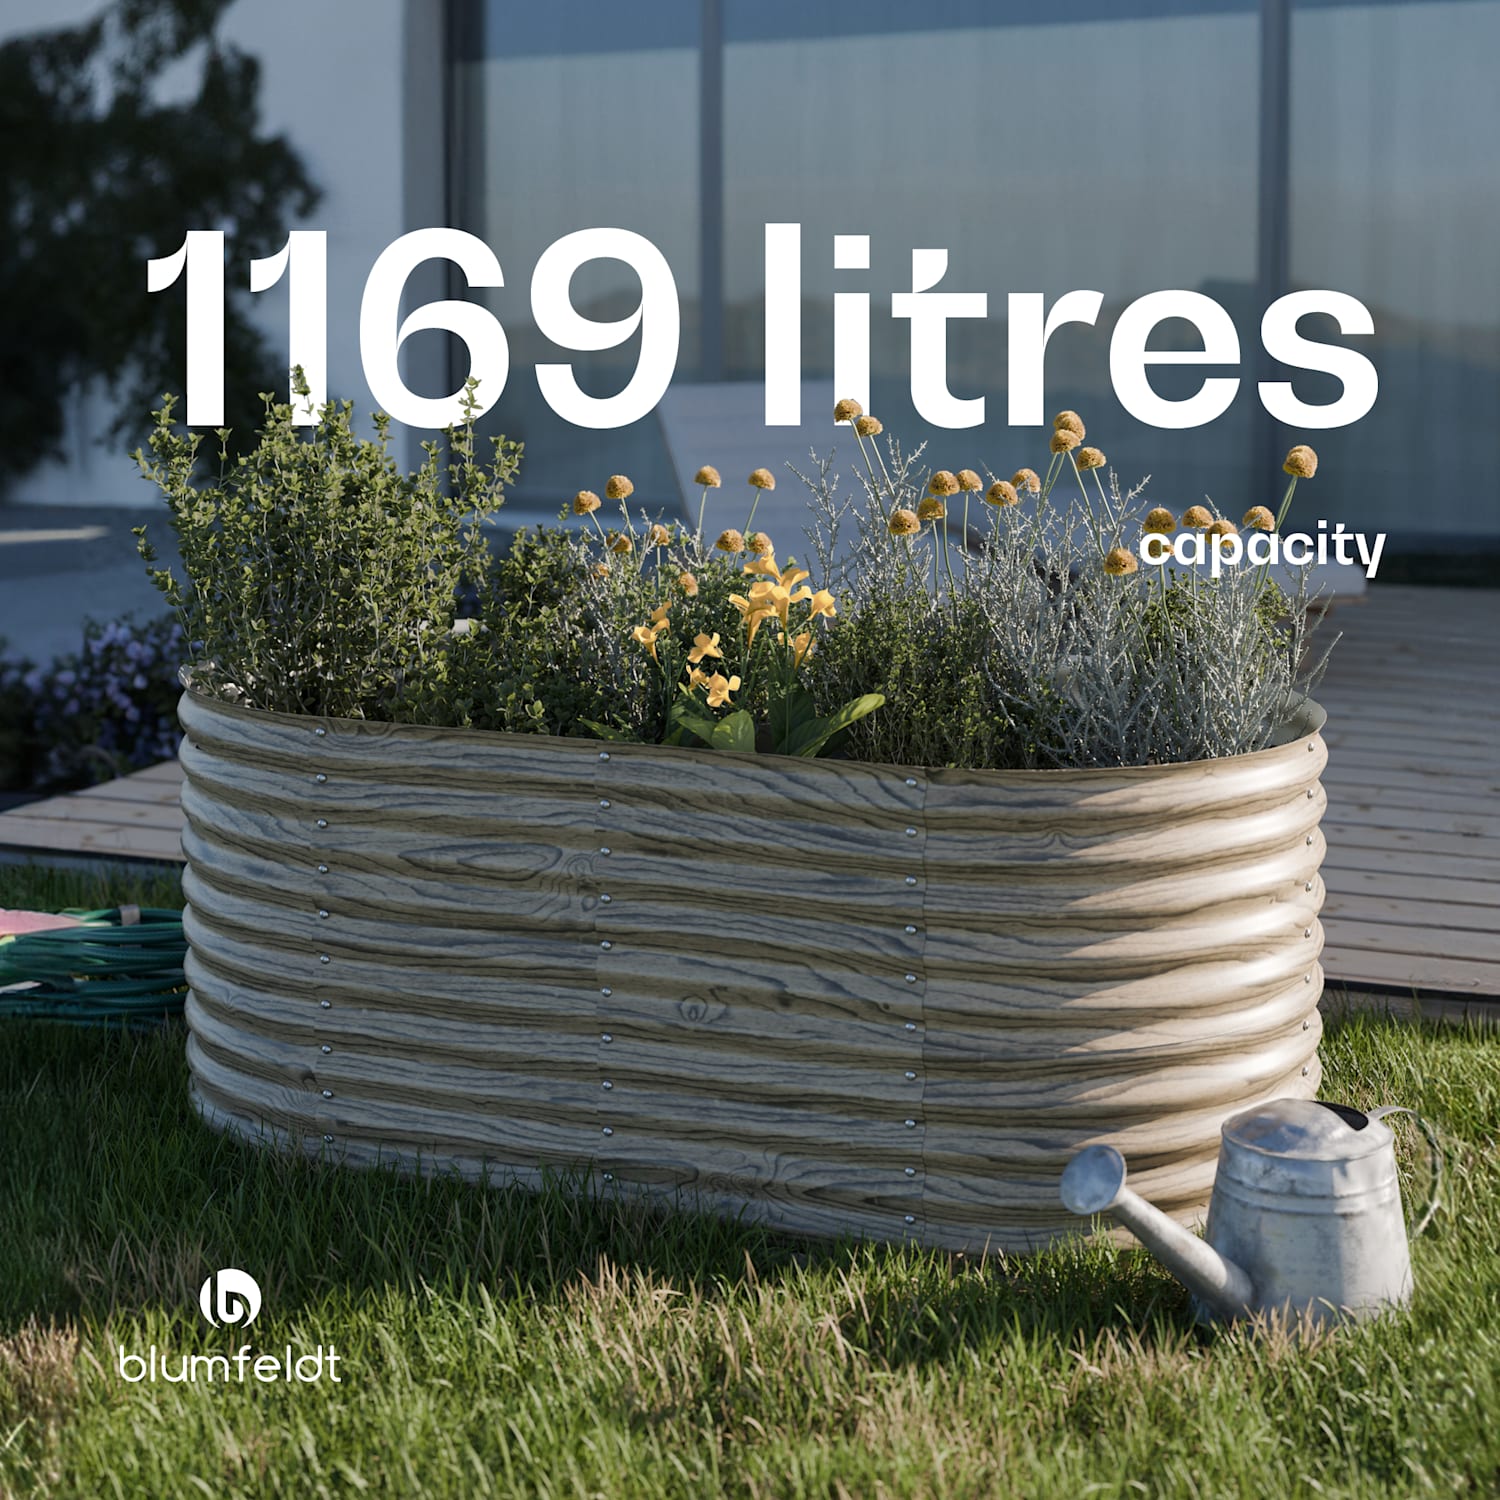
Room for a serious harvest: A 1,169-litre capacity across the oval bed gives you ample space for flowers, herbs, and vegetables — whether you're growing on a balcony, patio, or in the garden.
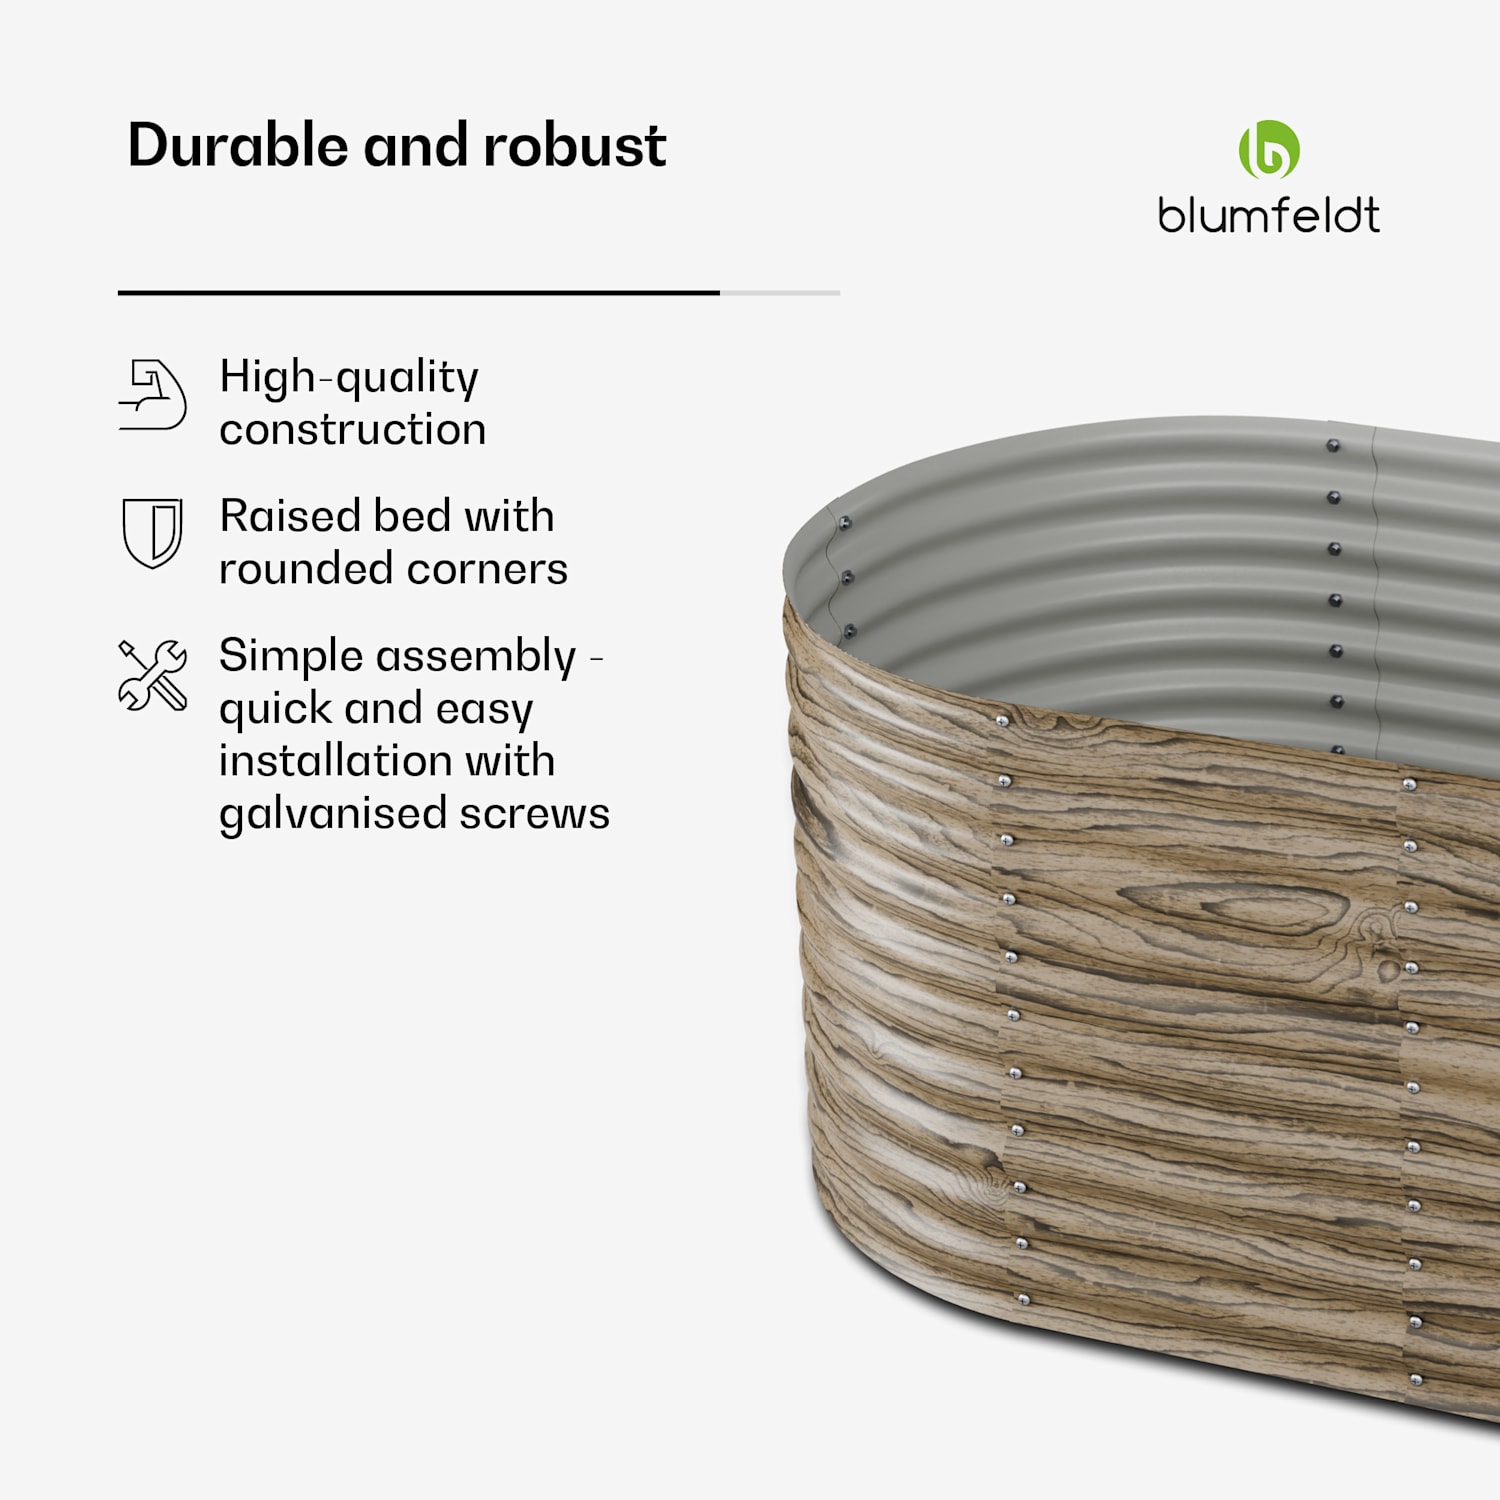
Stands up to British weather: Constructed from galvanised steel with 0.6 mm wall panels, the High Grow resists rain, frost, and UV exposure without rusting or deteriorating — season after season, year after year.
Roots go as deep as they need to: The open base structure drains excess water naturally and allows roots to reach down into the soil below. With a planting depth of 28–35 cm, even deep-rooting crops have room to develop properly.
Kinder to your back: The raised height brings your plants up to a comfortable working level, so you can tend to them standing up — no kneeling in mud, no bending double. A real difference if gardening has started to take a toll on your joints.
Up and growing in no time: Folded safety edges and solid metal corner connections mean the whole thing goes together without any specialist tools — straightforward enough for first-time raised-bed growers.
Product description
Back pain after weeding, knees in damp soil, no space for a proper garden – that doesn’t have to be the case. The Blumfeldt High Grow raised bed brings gardening to your level: comfortable, weatherproof, and at home on balconies or terraces.
With a capacity of 1,169 litres, the oval raised bed offers enough soil for tomatoes, lettuce, herbs, and root vegetables – no digging, no dedicated garden plot needed. The working height protects your back by eliminating kneeling and bending. A bed depth of 28–35 cm provides even deep-rooted plants with ample room to fully develop.
The construction of galvanized steel – wall thickness 0.6 mm – withstands rain, frost, and UV radiation year after year. The open bottom structure ensures optimal water drainage and unlimited root growth into the soil below. Corner joints with sturdy metal anchors keep the bed securely together even after years. If desired, a ground grid can be retrofitted to keep moles and weeds out from underneath.
The modular system can be combined with additional beds and shaped into almost any form – ideal for urban gardens, roof terraces, or terraced house gardens. Whether a herb spiral on the balcony or a vegetable bed in the front garden: the Blumfeldt High Grow adapts to your needs.
Especially popular with city gardeners, balcony plant lovers, and anyone for whom traditional gardening has become physically too demanding. And a tip: as a housewarming gift for a home with a garden, this raised bed is hard to beat.
Get the Blumfeldt High Grow and experience how uncomplicated gardening can be – delivered directly to your home.
Features
- Material: galvanized steel
- Colour: wood look
- Shape: oval
- Volume: 1,169 litres
- Side panel wall thickness: 0.6 mm
- Corner panel wall thickness: 0.6 mm
- Bed depth: 28–35 cm
- Safety edges: folded upwards
- Mounting type: upright installation
- Installation: simple, without special tools
- Open bottom structure: yes
- Suitable for: garden, terrace or balcony
- Year-round outdoor use: yes
- UV and weather resistant: yes
- Ergonomic design: yes
- Product type: raised bed
Dimensions and Technical Details
Product dimensions: 100 x 80 x 200 cm (WxHxD)
Weight: 26 kg
What will be delivered?
-
Raised bed
-
Screws
-
Nuts
-
Washers
-
Assembly instructions
Delivery & shipment
Shipping time: 3 - 5 days